Building a Time Planner with Python and PySide6
App Interface Overview

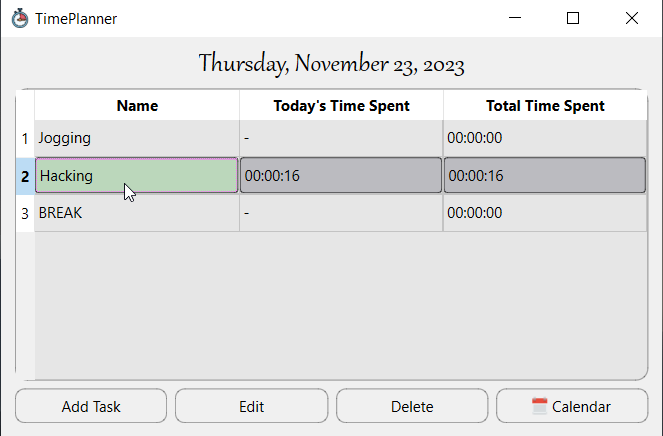
Figure 1: Time Planner app main widget.

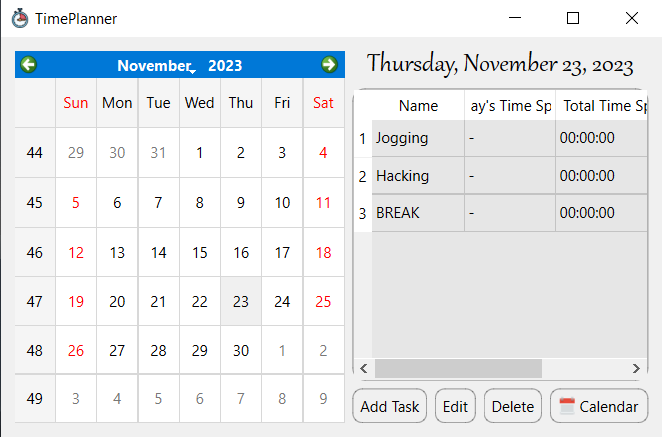
Figure 2: Task configuration widget.
Introduction
Have you ever felt overwhelmed by a busy schedule? This blog post explores the creation of a simple Time Planner app, developed in just a few hours to meet my wife's needs for organizing her time spent on tasks. It utilizes Python's powerful GUI framework, PySide6, to achieve this.
Source Code and Build Instructions
The repository is, as always, available on my GitHub.
PySide6 in Action
PySide6 is the official Python module from the Qt for Python project, offering access to the complete Qt 6.0+ framework and excelling in creating user-friendly interfaces. Here's how it enhances the TimePlanner:
- Intuitive Layouts: PySide6's widgets and layout managers facilitate the creation of a clear and organized interface, with task lists, scheduling components, and priority indicators neatly arranged for easy interaction.
- Seamless User Interaction: Featuring buttons, text boxes, and other interactive elements, it enables users to add, edit, or mark tasks as complete effortlessly.
- Cross-Platform Compatibility: One of its major advantages is ensuring that the app runs smoothly on both Windows and Linux, providing flexibility for users on different operating systems.
Development Process
- Conceptualization: The goal was to develop an app that allows users to add tasks to a daily list, store them, and start counting the time spent on a selected task upon clicking it.
- Environment Setup: The setup involves installing Python, PySide6, Pillow, and PyInstaller libraries. The development was primarily focused on Windows, as that's my wife's main operating system. To set up, simply run the following commands:
.\setup.ps1 .\venv\Scripts\Activate.ps1 pip install -r requirements.txt - GUI Design: The UI was entirely crafted manually, without the use of the Qt Designer tool, in the method
init_ui. - Functionality Implementation: The rest of the logic is straightforwardly implemented as part of the
TimePlannerclass, which inherits fromQWidget. - Storage: The history of tasks is stored in a
jsonfile namedtasks.jsonin the root folder of your script or executable file. - Local App Build: To build the app locally, simply run:
.\run.ps1 - Standalone Executable Deployment: A statically linked PE executable can be created using the PyInstaller tool by running the
.\deploy.ps1command.
Benefits and Impact
- Enhanced Organization: Tasks are clearly listed, prioritized, and easily accessible, fostering better focus and reducing mental clutter.
- Effective Time Management: Visual task scheduling aids in allocating time efficiently and avoiding last-minute rushes.
- Time Control: The app provides precise tracking of time spent on tasks, which can be useful for filling out timesheets in your company.
Future Enhancements
The app has significant potential for further development, including:
- Notifications: Using PySide6 to implement reminders or alerts for upcoming tasks or deadlines, ensuring important tasks are not overlooked.
- Collaboration Features: Potential for shared task lists or calendars, facilitating teamwork and project management.
- Data Synchronization: Exploring options for syncing task data across devices for seamless access from anywhere.
Conclusion
The TimePlanner app demonstrates the capabilities of Python and PySide6 in quickly creating user-friendly and effective tools. Originally developed for personal use, its core features can benefit anyone looking to optimize their schedule and improve time management skills.